Author: Julia Grace

  • Curly Hair Routine for Beginners: Your Simple 5-Step Guide to Beautiful Curls

    Curly Hair Routine for Beginners: Your Simple 5-Step Guide to Beautiful Curls

    Curly Hair Routine for Beginners
    Hair Routine for Beginners

    If you’re new to embracing your natural curls, you might feel overwhelmed by complicated routines and conflicting advice. You’re not alone! Most curly-haired beginners struggle with frizz, undefined curls, and not knowing where to start. The truth is, you don’t need a 20-step routine or expensive products to see amazing results.

    This Curly Hair Routine for Beginners breaks curly-hair care into five simple, manageable steps. We’ve eliminated confusion and jargon, focusing only on what truly works for most curl types. Whether you have wavy, curly, or coily hair, this foundation will help you build confidence and achieve healthier, more defined curls starting today.

    Why a Simple Routine Matters for Beginners

    Starting with a complex routine is the #1 mistake curly-hair beginners make. When you try to do too much too soon, you can’t tell what’s actually working. This 5-step Curly Hair Routine for Beginners lets you:

    • Identify what your hair needs without guesswork
    • Build consistent habits that become second nature
    • Save time and money by focusing on essential steps
    • See real progress as you master each step

    👉 Learn more about keeping routines simple in this Healthline guide to the Curly Girl Method.

    The 5-Step Curly Hair Routine for Beginners

    Step 1: Gentle Cleansing (The Reset)

    Why it matters: Traditional shampoos can strip natural oils, leaving curls dry and frizzy. Gentle cleansing removes buildup without damaging your hair’s moisture barrier.

    How to do it right:

    • Use a sulfate-free shampoo or co-wash (cleansing conditioner).
    • Focus on massaging your scalp with fingertips, not nails.
    • Let the water flow through your hair to rinse—don’t rough it up.

    Frequency: 1–2 times per week, or when your scalp feels oily.

    Beginner Tip: If your hair feels waxy after co-washing, alternate with a gentle shampoo.

    Step 2: Deep Conditioning (The Moisture Boost)

    Curly Hair Routine for Beginners
    Hair Routine for Beginners

    Curly hair is naturally drier because oils can’t easily travel down the spiral shape. Deep conditioning replaces lost moisture.

    How to do it right:

    • Apply conditioner from mid-lengths to ends (where hair is oldest/driest).
    • Use a wide-tooth comb to detangle while conditioner is in.
    • Leave on for 3–5 minutes—set a timer!
    • Rinse with cool water to seal the cuticle.

    Beginner Tip: Do a deep-conditioning treatment once a week for extra-dry or damaged hair.

    For ingredient ideas, see this WebMD article on curly-hair care.

    Step 3: Leave-In Protection (The Hydration Lock)

    Leave-in products create a moisture barrier that prevents water loss throughout the day.

    How to do it right:

    • Apply to soaking-wet hair right after showering.
    • Use the praying-hands method: smooth product over sections.
    • Focus on ends where moisture is needed most.
    • Don’t oversaturate—start with a quarter-sized amount.

    Beginner Tip: If your hair feels crunchy or sticky, you’re using too much product.

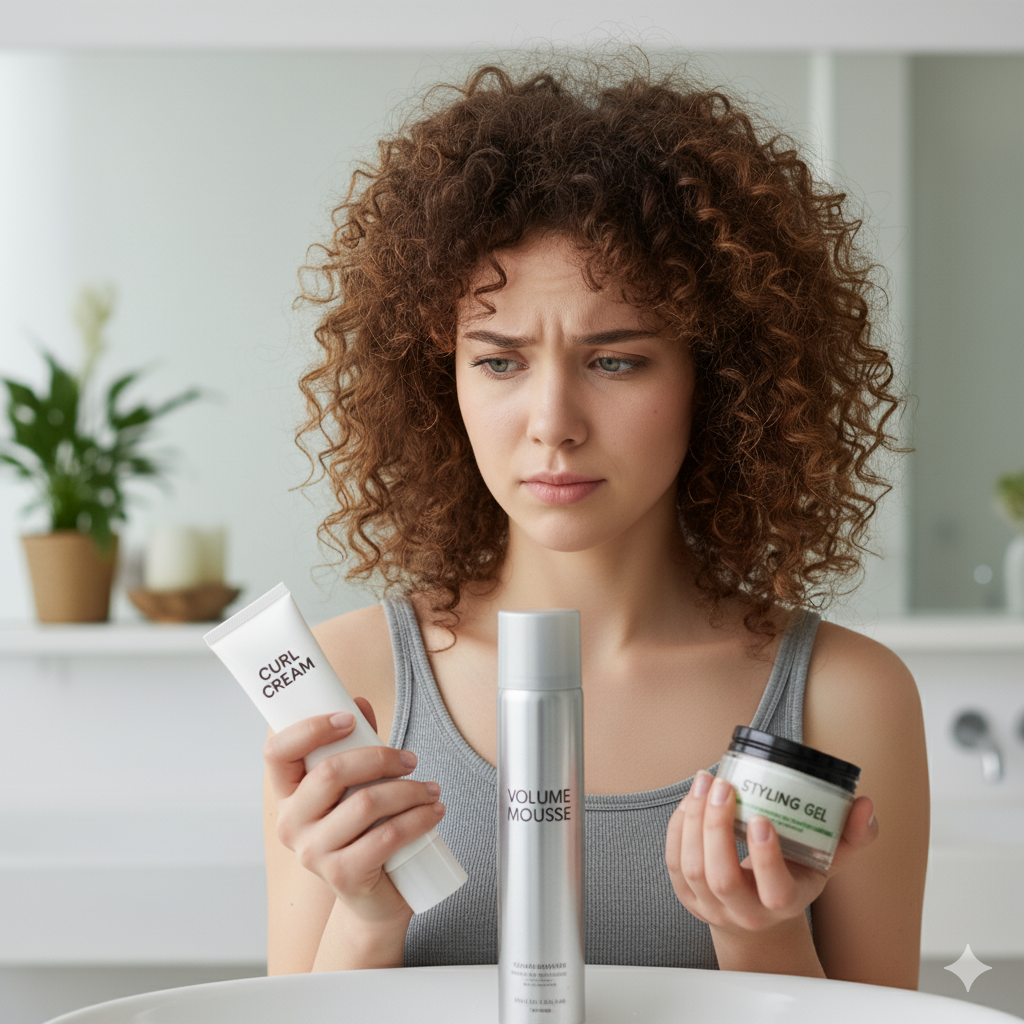
    Step 4: Styling for Definition (The Shape)

    Styling products help your curls form defined clumps instead of frizzy strands.

    How to do it right:

    • Choose one styler: cream for moisture, gel for hold, or mousse for volume.
    • Apply to wet hair using the praying-hands method.
    • Scrunch upward toward your scalp to encourage curl formation.
    • Don’t break up the curl clumps as they form.

    Beginner Tip: Start with a lightweight gel it’s forgiving and provides great definition.

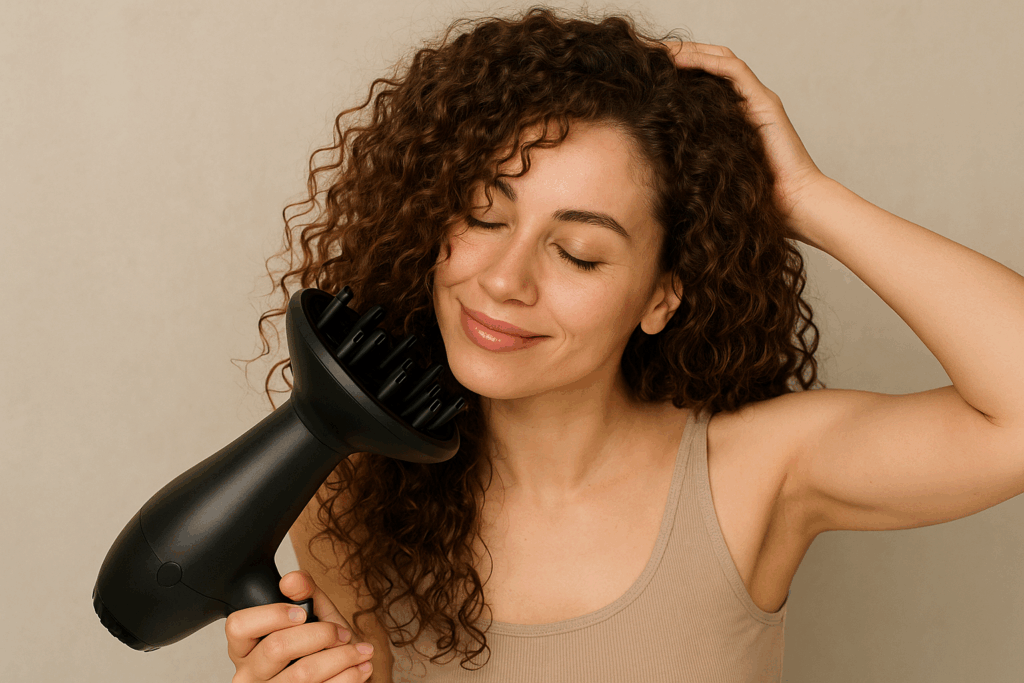
    Step 5: Drying with Care (The Finish)

    How you dry your hair can make or break your curl definition.

    How to do it right:

    • Gently scrunch out excess water with a microfiber towel or cotton T-shirt.
    • Avoid rubbing vigorously—this causes frizz.
    • Let air-dry or use a diffuser on low heat/cool setting. Get a good diffuser click me.
    • Don’t touch your curls while they’re drying!

    Beginner Tip: If using a diffuser, hover it around your head rather than placing curls directly in the bowl.

    Common Beginner Mistakes to Avoid

    Overloading Products – Using too many products makes hair heavy and greasy.

    Skipping Deep Conditioning – Curls need regular moisture to recover.

    Rough Drying – Terry cloth towels create frizz; use microfiber instead.

    Touching Curls While Drying – Breaks up curl formation.

    Comparing Your Day 1 to Someone’s Year 3 – Curl transformation takes time.

    Sample Weekly Schedule for Beginners

    1. Day Routine Time Estimate
    2. Wash Day Full 5-step routine 45-60 minutes
    3. Day 2 Refresh with water spray, light scrunch 5 minutes
    4. Day 3 Pineapple overnight, shake out in morning 2 minutes
    5. Day 4 Refresh with water + little leave-in 10 minutes
    6. Next Wash Full routine again 45-60 minutes

    Sample Weekly Schedule for Beginners

    DayRoutineTime Estimate
    Wash DayFull 5-step routine45–60 min
    Day 2Refresh with water spray, light scrunch5 min
    Day 3Pineapple overnight, shake out2 min
    Day 4Refresh with water + leave-in10 min
    Next WashFull routine again45–60 min

    Beginner-Friendly Product Types (Not Brands)

    • Shampoo: Sulfate-free, gentle cleansers
    • Conditioner: Silicone-free, rich in moisturizing ingredients
    • Leave-in: Lightweight, water-based formulas
    • Styler: Gels or mousses with good hold but no crunch

    Frequently Asked Questions (FAQ)

    • Q1: How long until I see results with this routine?
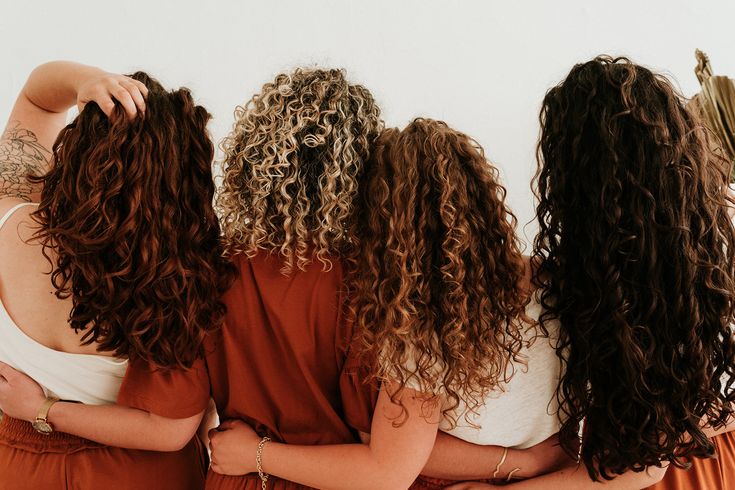
      Most beginners see improvement within 2-4 weeks. Full transformation can take 3-6 months as your hair recovers from previous damage and adjusts to the new routine.
    • Q2: What if I have multiple curl patterns on my head?
      This is completely normal! Focus on techniques that work for your tightest curls, as they usually need the most moisture. Your looser curls will be fine with the same routine.
    • Q3: Can I use this routine if I have wavy hair?
      Absolutely! The principles are the same—wavy hair just might need lighter products and less frequent deep conditioning.
    • Q4: How often should I trim my hair as a beginner?
      Every 3-4 months to prevent split ends from traveling up the hair shaft and undoing your progress.
    • Q5: What’s the most important step for reducing frizz?
      Proper drying technique! How you dry your hair has more impact on frizz than any product you use.
    • Q6: Can I skip the styler if I want more natural hair?
      You can, but you’ll likely have more frizz and less definition. A lightweight gel provides hold without making hair feel product-y.
    • H2: Conclusion: Your Curly Journey Starts Here
      Remember that every curly hair journey is unique. What works for your friend might not work for you, and that’s okay! The goal of this beginner routine is to establish a solid foundation you can build upon.

    Ready to begin? Pick your next wash day and commit to trying just these 5 steps. Take a before photo, be patient with the process, and most importantly have fun getting to know your beautiful curls!

    Hair Routine for Beginners

    Conclusion: Your Curly Journey Starts Here

    Remember that every Curly Hair Routine for Beginners is unique. What works for your friend might not work for you, and that’s okay! The goal of this routine is to establish a strong foundation you can build on.

    Ready to begin? Pick your next wash day and commit to trying just these five steps. Take a before photo, be patient with the process, and most importantly have fun discovering your beautiful curls!

    For extra learning, read our Perfect Wash Day Routine for Curly Hair and explore more guides on Curly Hair Hive.

  • 5 Curly Hair Care Mistakes to Avoid for Beautiful, Healthy Curls!

    5 Curly Hair Care Mistakes to Avoid for Beautiful, Healthy Curls!

    Curly Hair Care Mistakes are more common than you might think! If you’re new to embracing your natural curls, you might feel overwhelmed by complicated routines and conflicting advice. You’re not alone most curlies struggle with frizz, undefined curls, and not knowing where to start. The good news? These Curly Hair Care Mistakes are easy to fix once you know what to avoid.

    This guide breaks down five of the most common Curly Hair Care Mistakes that can hold your curls back. With simple fixes, you can enjoy smoother, shinier, and healthier curls no 20-step routine or expensive products needed.

    5 Curly Hair Care Mistakes to Avoid!

    5 Common Mistakes in Curly Hair Care And How to Avoid Them

    Caring for curly hair is both an art and a science. But many new curlies unintentionally sabotage their curls with small missteps that lead to frizz, dryness, and breakage. The truth is, these Curly Hair Care Mistakes are easy to avoid with the right knowledge and consistency. Whether you’re just starting your curly hair journey or trying to revive your curls after years of damage, knowing what not to do is just as important as knowing what works.

    In this post, we’ll cover the top 5 Curly Hair Care Mistakes and how to fix them so your curls can truly thrive. These tips are backed by haircare experts and real curlies who’ve seen dramatic improvements with small changes.

    Mistake 1 – Using Harsh Shampoos

    Why it’s a problem: Sulfates are strong detergents found in many shampoos that strip natural oils from your scalp and strands. While they can make your hair feel squeaky clean, they also leave curls dry and vulnerable.

    Fix: Use a sulfate-free shampoo or gentle cleanser. Look for ingredients like coco-glucoside or decyl glucoside, which cleanse effectively without removing essential moisture. Reduce wash frequency to 1–2 times per week depending on your activity level.

    👉 Learn more about why sulfate-free shampoos matter in this Healthline article.

    5 Curly Hair Care Mistakes to Avoid!

    Mistake 2 – Skipping Conditioner

    Conditioner is non-negotiable for curly hair. It seals the cuticle, making curls smoother, shinier, and easier to detangle. Skipping conditioner leads to breakage and frizz two of the most common Curly Hair Care Mistakes beginners make.

    Fix: Always follow shampoo with a moisturizing conditioner rich in shea butter, aloe vera, or glycerin. Deep condition weekly with a nourishing mask to repair and protect your strands.

    Mistake 3 – Brushing Dry Hair

    Brushing dry curls disrupts their natural pattern and causes breakage. The friction lifts the hair cuticle, resulting in frizz and dullness.

    Fix: Detangle only on soaking wet hair with a wide-tooth comb or your fingers while your hair is saturated with conditioner. If you need a brush, use a detangling one starting from the ends and working up.

    Mistake 4 – Using the Wrong Towel

    Regular cotton towels absorb too much water and rough up the cuticle layer, causing frizz. They can also separate curl clumps, leaving your hair undefined.

    Fix: Swap your regular towel for a microfiber towel or a soft cotton T-shirt. These fabrics are gentler and help retain moisture. Gently scrunch excess water don’t rub!

    Avoiding this one small habit can prevent one of the most common Curly Hair Care Mistakes and instantly improve your curl definition.

    Mistake 5 – Over-Styling with Heat

    Heat tools like flat irons and blow dryers can permanently weaken curl bonds, leading to limp or inconsistent curls. Overuse of heat is a serious Curly Hair Care Mistake that can take months to repair.

    Fix: Embrace air drying whenever possible, or use a diffuser on low heat and speed to maintain curl structure. Always apply a heat protectant spray before styling to minimize damage.

    Bonus Tip – Ignoring Your Hair’s Porosity

    Porosity determines how well your hair absorbs and retains moisture. Ignoring it can lead to product mismatch and frustration.

    Fix: Do a quick porosity test (strand float or spray test).

    • Low porosity: use lightweight, water-based products.
    • High porosity: go for richer creams and sealants.

    Understanding porosity helps you tailor your routine and avoid unnecessary Curly Hair Care Mistakes.

    Quick Curly Hair Care Checklist

    ✅ Use sulfate-free shampoo
    ✅ Always condition
    ✅ Detangle when wet
    ✅ Use microfiber towel
    ✅ Limit heat use
    ✅ Know your porosity type
    ✅ Seal with oils if needed
    ✅ Sleep on a silk or satin pillowcase

    Thousands of curly-haired people have transformed their routines by fixing these small mistakes and you can too!

    Conclusion: Start Fixing Your Curly Hair Care Mistakes Today

    Caring for curls doesn’t have to be complicated. When you identify and avoid these Curly Hair Care Mistakes, your curls will reward you with bounce, shine, and definition.

    Small tweaks to your routine make a big difference and consistency will help you see results faster.

    Ready to take your routine to the next level?
    Download our free “Curly Hair Care Mistakes Guide” to keep this checklist handy and start your journey to healthier, happier curls today!

    📖 Explore more on Perfect Wash Day Routine for Curly Hair and Curly Hair Routine for Beginners.

  • Perfect Wash Day Routine for Curly Hair

    Perfect Wash Day Routine for Curly Hair

    Master your Wash Day Routine with this step-by-step guide. Learn how to cleanse, condition, and style your curls for lasting definition, bounce, and shine without stress or guesswork.

    Wash Day Routine

    The Perfect Wash Day Routine for Curly Hair: Step-by-Step Guide

    Wash day for curly hair is more than just shampoo and rinse it’s the foundation of your curl health. Done right, it sets you up for days of frizz-free, bouncy, and hydrated curls. Done wrong, and you might be fighting dryness and tangles all week.

    In this guide, you’ll learn the step-by-step curly hair wash day routine that thousands of curlies trust.

    Why Wash Day Matters for Curly Hair

    Wash day for curly hair is more than just shampoo and rinse it’s the foundation of curl health. Done right, your Wash Day Routine sets you up for days of frizz-free, hydrated curls. Done wrong, and you’ll be fighting dryness and tangles all week. Curly hair dries out faster because natural oils have a harder time traveling down each curl’s twists and turns. That’s why technique and moisture are everything.

    A structured Wash Day Routine will:

    • Boost curl definition
    • Reduce frizz
    • Prevent breakage
    • Lock in moisture

    Step 1 – Pre-Poo (Optional but Recommended)

    Before shampooing, apply a light oil (coconut, jojoba, or argan) or a slippery conditioner to dry hair.
    Why it helps: It cushions strands, softens tangles, and reduces moisture loss during cleansing.
    How to: Apply from mid-lengths to ends, detangle gently with fingers, and leave on 20–30 minutes. Pop on a shower cap for extra slip.

    Step 2 – Gentle Cleansing

    Cleansing the scalp is non-negotiable in any Wash Day Routine. A clean scalp = healthier growth and better product absorption.

    How to:

    Use a sulfate-free shampoo (to get it) click here.

    • Massage the scalp with fingertips (never nails).
    • Let suds rinse through the lengths no rough scrubbing.

    👉 Learn the basics behind gentle cleansing and the Curly Girl approach here: Healthline – Curly Girl Method.

    Frequency: 1–2 times per week, adjusting to your lifestyle and scalp needs.

    Step 3 – Deep Conditioning

    Curly hair = thirsty hair. Deep conditioning replenishes moisture and elasticity so curls spring back.
    How to:

    • Apply a deep conditioner or mask from mid-lengths to ends.
    • Detangle with a wide-tooth comb while it’s in.
    • Leave on 10–20 minutes.
    • Rinse with cool water to help seal the cuticle.
     Wash Day Routine

    Step 4 – Styling with the LOC Method

    After deep conditioning (or on weeks you skip it), use a hydrating rinse-out conditioner to add slip and smoothness.
    Tips:

    • Target knots carefully work from ends upward.
    • If your hair is fine/low-porosity, go lighter and rinse more thoroughly.

    Step 5 – Drying Curls Without Frizz

    Applying products on very wet hair helps clump curls and lock in moisture. Choose one of these simple frameworks:

    • LOC: Leave-in → Oil → Cream (for plush moisture)
    • LCG: Leave-in → Cream → Gel (for stronger hold and frizz control)

    Work in sections; smooth product with praying hands, then scrunch to encourage curl formation.
    👉 Dermatologist-approved curly care overview: WebMD – What to Know About Curly Hair.

     Wash Day Routine

    Step 6 – Dry Without Frizz

    How you dry can make or break your Wash Day Routine.

    • Blot with a microfiber towel or cotton T-shirtnever rough rub.
    • Air dry when possible, or diffuse on low heat/low speed.
    • Hands off while drying! Touching disturbs curl clumps and creates frizz.
    • Once 100% dry, scrunch out the crunch to soften gel cast and reveal shine.

    Step 7 – Protect Overnight

    Preserve results between wash days:

    • Sleep on a silk/satin pillowcase or use a bonnet – You could find one on Amazon with this link click here.
    • Try the pineapple (loose high ponytail) to prevent flattening.
    • In the morning, refresh with a light water mist + a dab of leave-in.

    Common Wash Day Mistakes to Avoid

    • Using harsh sulfate shampoos that strip moisture
    • Skipping conditioner or rushing detangling
    • Applying stylers on nearly dry hair
    • Blow-drying without a diffuser
    • Touching curls while they dry

    If these sound familiar, you’ll love this companion post:
    Internal links:

    Sample Wash Day Schedule (Simple & Effective)

    • Sunday – Full routine: Cleanse, deep condition, style, dry
    • Wednesday – Refresh: Light water mist + leave-in; spot-style with gel
    • Friday – Optional co-wash: If scalp needs it; otherwise stretch to Sunday

    Consistency is key the more consistent your Wash Day Routine, the better your curls behave.

    FAQs

    How often should I do a full Wash Day Routine?
    Most curlies thrive on once or twice a week. Adjust based on workout/sweat and scalp needs.

    Do I need both a deep conditioner and a rinse-out?
    If you deep condition weekly, you can go lighter with your rinse-out—or skip it if hair feels weighed down.

    Which is better: LOC or LCG?
    Fine/wavy hair often prefers LCG (lighter feel + hold). Thick/coily hair often loves LOC (richer moisture). Test and see.

    Conclusion: Your Best Wash Day Routine Starts Now

    With the right steps and patience, your Wash Day Routine becomes simple, repeatable, and effective. Focus on gentle cleansing, deep hydration, styling on wet hair, and frizz-free drying. Small tweaks make a big difference your curls will reward you with bounce, definition, and shine.

  • Curly Hair 101: Discover Your Curl Type, Porosity & Texture for Healthy, Happy Curls

    Curly Hair 101: Discover Your Curl Type, Porosity & Texture for Healthy, Happy Curls

    Welcome to Curly Hair 101 your beginner’s guide to understanding the science and beauty behind your curls. Whether you’re just starting your curly-hair journey or looking to refine your routine, knowing your curl type, hair porosity, and texture is key. Once you understand these three elements, you can choose products and techniques that truly work for your hair, not against it.

    What’s Your Curl Type?

    Curly Hair 101

    The first step in Curly Hair 101 is discovering your curl pattern. Most curl experts use the Type 2–4 system to describe different curl shapes:

    • Type 2 (Wavy): Hair forms a gentle “S” shape, from loose (2A) to defined (2C). It’s often fine and can lose shape easily.
    • Type 3 (Curly): Hair forms spirals ranging from soft (3A) to tight ringlets (3C). It’s full of bounce but prone to frizz.
    • Type 4 (Coily/Kinky): Hair forms very tight “Z” patterns (4A to 4C). It’s incredibly versatile and beautiful but needs extra moisture.

    💡 Pro Tip: You might have more than one curl type on your head and that’s completely normal!

    For a visual guide, check out Naturally Curly’s Curl Type Chart a great resource to see where you fit.

    Understanding Hair Porosity

    Porosity determines how well your hair absorbs and retains moisture an essential part of Curly Hair 101.

    How to test porosity:
    Place a clean strand of hair in a glass of water.

    • If it floats, you have low porosity.
    • If it sinks slowly, you have normal porosity.
    • If it sinks quickly, you have high porosity.
    Curly Hair 101 hair porosity water test illustration

    Low Porosity

    Tight cuticles make it hard for moisture to enter but easy to retain. Use lightweight, water-based products and add heat (like a warm towel) during deep conditioning.

    Normal Porosity

    Balanced cuticles absorb and retain moisture well. Most products work easily on this hair type.

    High Porosity

    Open cuticles absorb moisture fast but lose it quickly too. Use heavier creams and sealants (like oils or butters) to lock in hydration. Avoid harsh heat or chemical treatments.

    👉 Recommended read: Healthline – What Is Hair Porosity?

    Identifying Your Hair Texture & Density

    Close-up of curly hair strands showing texture and density differences

    Texture refers to how thick or fine each strand of hair is.

    • Fine: Soft, delicate, easily weighed down by heavy products.
    • Medium: The most common; holds styles well.
    • Coarse: Strong and resistant but can feel dry.

    Density refers to how much hair you have on your head the number of strands per inch.

    • Low Density: Scalp easily visible; use lightweight stylers.
    • Medium: Full, balanced appearance.
    • High Density: Thick and voluminous; best managed in sections.

    How to Use This Information

    Now that you know your Curly Hair 101 profile, you can tailor your hair routine:

    Hair TypePorosityProduct Tips
    Type 2 + Low PorosityLightweight leave-ins, mousses, avoid heavy oils
    Type 3 + Normal PorosityBalanced moisture + light-hold gels
    Type 4 + High PorosityRich butters, creams, and sealing oils

    Internal links:
    Perfect Wash Day Routine for Curly Hair
    Curly Hair Routine for Beginners

    Common Curly Hair Myths — Debunked!

    1. “My curls don’t grow.”
      They do! Curly hair just shrinks, making growth harder to see.
    2. “I can use any shampoo.”
      Harsh sulfates strip natural oils — always go for sulfate-free cleansers.
    3. “More product = better curls.”
      Nope! Too much can weigh your curls down. Start light and layer gradually.

    Conclusion

    Curly Hair 101 is about learning your hair’s language. Once you understand your curl type, porosity, and texture, caring for your hair becomes intuitive. Experiment, observe, and don’t stress perfection your curls are unique and beautiful just as they are.

    Ready to take the next step?
    ✨ Try our Curly Hair Routine for Beginners and start building your personalized curl care plan today.

    Frequently Asked Questions (FAQ)

    Q1: Can my porosity change over time?
    A: Yes, chemical processing, heat damage, and age can alter your hair’s porosity, typically making it higher.

    Q2: What if I have multiple curl patterns?
    A: This is very common! Focus on techniques and products that enhance your loosest and tightest curls. Styling with your hands can help clump similar curls together.

    Q3: Is the curl type system necessary?
    A: It’s a helpful starting point for communication and finding inspiration, but it’s not a strict rulebook. Focus more on porosity and density for your daily routine.

    Q4: How often should I reassess my curl type and porosity?
    A: It’s a good idea to check your porosity every 6-12 months or after any major chemical treatment, as it can change. Your curl type is generally more constant.

  • Your Weekly Curly Hair Routine for Defined, Healthy Curls (7-Day Guide)

    Your Weekly Curly Hair Routine for Defined, Healthy Curls (7-Day Guide)

    A great curly hair routine isn’t just about what you do on wash day it’s about how you care for your curls all week long. Consistency is the secret to achieving defined, moisturized, and bouncy curls that last. A predictable weekly schedule helps your hair thrive by balancing moisture, definition, and volume.

    This step-by-step weekly curly hair routine is adaptable for every curl pattern from loose waves to tight coils. Follow this guide to keep your curls looking healthy, soft, and frizz-free all week long.

    weekly curly hair routine

    Wash Day: The Foundation of Your Routine

    For most curlies, wash day happens once or twice a week. Think of it as your curl reset day the foundation for definition and hydration.

    1. Pre-Poo (Optional but Helpful)
    Apply a lightweight oil (like coconut, almond, or jojoba) to dry hair before shampooing. Focus on the ends to protect against dryness and breakage.

    2. Cleanse Gently
    Use a sulfate-free shampoo or co-wash to cleanse the scalp without stripping moisture. Massage your scalp with your fingertips (never nails) to stimulate blood flow and remove buildup.

    3. Condition and Detangle
    Follow up with a moisturizing conditioner. Detangle your hair with a wide-tooth comb or your fingers, working from ends to roots. Rinse with cool water to seal the cuticle.

    4. Deep Condition (Weekly Treatment)
    Once a week, swap your regular conditioner for a deep conditioning mask. Cover your hair with a shower cap and leave it on for 20–30 minutes. This step strengthens curls and restores elasticity.

    🪄 External resource: Why Deep Conditioning Is Essential for Curly Hair (NaturallyCurly.com)

    Styling Day for Defined Curls

    Your Weekly Curly Hair Routine for Defined

    weekly curly hair routine

    Right after washing, apply styling products while your hair is still wet.

    1. Leave-In Conditioner: Adds moisture and slip for smooth curls.
    2. Styler Application: Use the “praying hands” method to apply curl cream, then scrunch in your favorite gel or mousse for hold.
    3. Drying: Pat (don’t rub) with a microfiber towel or cotton T-shirt. Air dry or diffuse on low heat. Avoid touching your curls until fully dry to prevent frizz.

    💡 Pro Tip: Layering lightweight products helps maintain definition longer without buildup.

    Mid-Week Refresh: Reviving Your Curls

    By day 3 or 4, your curls might need a little love.

    The Water Spritz: Mix water with a small amount of leave-in conditioner in a spray bottle. Lightly mist and reshape your curls.
    Rescrunch: Add a touch of curl cream or gel to reactive your style.
    Pineapple Overnight: Gather hair loosely at the top of your head using a satin scrunchie and cover with a silk bonnet or pillowcase to prevent friction.

    🪄 External resource: Best Ways to Refresh Curls Mid-Week (NaturallyCurly.com)

    End-of-Week Prep

    By the end of the week, assess how your hair feels. If it’s still soft and defined, you can extend your wash day. If it feels dry or frizzy, start over with your next wash day routine.

    Consistency is key your curls will begin to “learn” your schedule and respond with better definition and shine over time.

    weekly curly hair routine

    Conclusion

    A consistent weekly curly hair routine turns hair care into a self-care ritual. Adjust based on how your hair feels more hydration for dryness, protein if your curls lose bounce.

    Your curls will reward you with long-lasting definition, shine, and health.

    📥 Download your free “Curly Hair Weekly Routine Checklist” and start your journey to perfectly defined curls today!

    Frequently Asked Questions (FAQ)

    Q1: How often should I wash my curly hair?
    A: It depends on your hair’s needs and lifestyle. Once a week is a good starting point for most, but some may need to wash every 4-5 days, while others can go 10 days or more.

    Q2: What if I work out and sweat a lot?
    A: If you sweat heavily, you might need to rinse or co-wash more frequently. A simple scalp rinse with water and a light conditioner can refresh without a full wash.

    Q3: Can I skip deep conditioning?
    A: Deep conditioning is vital for maintaining long-term hair health, especially for curly hair that is naturally drier. If you’re short on time, even 10 minutes is better than nothing.

    Q4: My curls fall flat by day two. What can I do?
    A: Ensure you’re using a strong enough hold product (like a gel) on wash day. For refreshing, try focusing the water and product only on the top layers of your hair where flatness occurs.

    Internal links:
    Perfect Wash Day Routine for Curly Hair
    Curly Hair Routine for Beginners

  • How to Moisturize Curly Hair: Proven & Effective Steps for Beautiful Curls

    How to Moisturize Curly Hair: Proven & Effective Steps for Beautiful Curls

    If you’ve been struggling with dry, frizzy curls, it’s time to learn how to moisturize curly hair properly. Curly, coily, and wavy textures are naturally drier than straight hair because the scalp’s oils can’t easily travel down the hair shaft. That’s why keeping moisture locked in is essential for soft, defined curls.

    Moisture isn’t about layering random products; it’s about understanding how humectants, emollients, and sealants work together to create lasting hydration. Let’s break down how to give your curls the care they deserve.

    how to moisturize curly hair properly

    The Moisture Trinity: Humectants, Emollients, and Sealants

    To moisturize curly hair effectively, you need to balance three types of ingredients. The science behind moisture balance in curls is explained beautifully in NaturallyCurly: The Science of Moisture in Curly Hair.

    1. Humectants – Attract Moisture
    These draw water from the air into your hair.
    Examples: Glycerin, Honey, Aloe Vera Juice
    💡 Tip: In dry climates, balance humectants with oils to prevent frizz.

    2. Emollients – Soften the Hair Shaft
    They smooth and fill in gaps in your cuticle for soft, touchable curls.
    Examples: Shea Butter – click here for organic product, Jojoba Oil, Sunflower Oil

    3. Sealants – Lock It All In
    Sealants trap moisture inside, keeping curls hydrated longer.
    Examples: Castor Oil, Coconut Oil, Mango Butter

     how to moisturize curly hair
    how to moisturize curly hair properly.

    Your Step-by-Step Hydration Routine

    This is the routine every curly girl should follow after washing her hair. For a complete guide to building the perfect foundation, check out our Perfect Wash Day Routine for Curly Hair.

    1. Start with a Hydrating Leave-In Conditioner
      Apply a water-based leave-in containing humectants like glycerin or aloe.
    2. Use a Curl Cream (Emollient Layer)
      Follow with a rich curl cream to define and clump curls.
    3. Seal in Moisture
      If your curls are high-porosity or feel dry, seal the ends with a few drops of lightweight oil.
    4. Hold with Gel
      A good gel not only provides hold it also creates a moisture barrier.
    how to moisturize curly hair properly.

    Deep Hydration: DIY Hair Masks

    If you’re new to natural hair care, you might want to revisit our Curly Hair Routine for Beginners to understand how hydration fits into a consistent regimen.

    Use one of these weekly treatments to keep your curls nourished:

    ✨ Intense Moisture Mask:

    • 1 ripe banana
    • 2 tbsp honey
    • 3 tbsp yogurt
      Mix, apply to damp hair, cover, and rinse after 30 minutes.

    ⚡ Quick Boost Mask:

    • 3 tbsp coconut milk
    • 1 tbsp olive oil
      Warm slightly and apply for 20 minutes, then rinse thoroughly.

    How to Moisturize Curly Hair Based on Porosity

    • Low Porosity: Hair resists moisture → use heat or steam to open cuticles.
    • Normal Porosity: Balanced—most products work well.
    • High Porosity: Absorbs fast but loses moisture quickly → use thick creams & oils.

    Signs Your Hair is Well-Moisturized

    Moisturize Curly Hair
    how to moisturize curly hair properly.

    How can you tell if your routine is working? Your hair should feel:

    • Soft and supple, not hard or brittle
    • Elastic (a stretched curl should bounce back, not break)
    • Defined with minimal frizz
    how to moisturize curly hair properly.

    Conclusion

    Mastering moisture is the cornerstone of curly hair care. By layering your products strategically and listening to what your hair needs, you can finally say goodbye to dry, thirsty curls.

    Have you tried a DIY hair mask before? Which ingredients does your hair love the most? We’d love to hear about your experiences!

    Frequently Asked Questions (FAQ)

    Q1: Why does my hair still feel dry after I moisturize?
    A: This is often a sign of product buildup that blocks moisture from getting in. Try a clarifying shampoo to reset. It could also mean you need a protein treatment to strengthen your hair’s ability to hold moisture.

    Q2: Can I over-moisturize my hair?
    A: Yes! This is called “moisture overload.” Hair will feel mushy, stretchy, and limp. If this happens, scale back on deep conditioning and incorporate a protein treatment to restore balance.

    Q3: Is coconut oil a good moisturizer?
    A: Coconut oil is an excellent sealant, but it is not a moisturizer on its own because it doesn’t contain water. Always apply it to damp hair or over a water-based product to lock in moisture. A good coconut brand recommendation click here.

    Q4: How often should I do a deep conditioning treatment?
    A: Most curlies benefit from a deep conditioner once a week. If your hair is chemically treated or high-porosity, you might need it twice a week. Low-porosity hair might only need it every two weeks to avoid buildup.